


Hooker Fenderwell Headers – Precision-Fit Exhaust Solutions
Our fenderwell headers solve the clearance puzzle on classic muscle chassis where engine swaps, lowered suspensions, or steering box interference make conventional long-tube designs impossible. Routing the primaries up and over the front wheels through the fenderwells, this system delivers uncompromised exhaust flow while preserving precious inches of ground clearance and steering column room.
Built from 16-gauge mandrel-bent mild steel tubing, each primary transitions smoothly into slip-fit collectors engineered for direct connection to your exhaust system. We pair collector gaskets, hardware, and detailed fitment instructions with every kit so you can tackle installation with confidence.
Core specs for this fenderwell system
Why Fenderwell Routing Matters for Tight-Chassis Builds
Traditional long-tube headers exit downward below the engine, a path that works fine on stock-height street cars but becomes a liability the moment you lower the suspension or swap in a big-block that crowds the steering box. Fenderwell headers re-route the primaries upward, running them through the inner fender panels and out the side of the chassis. This vertical path clears steering shafts, minimizes ground scraping, and opens up exhaust options for cars running radical ride heights or non-stock engine mounts.
The trade is packaging complexity—you’ll need to notch the inner fenders and plan for adequate heat shielding near brake lines and wiring—but the payoff is a header system that actually fits where others hit metal. For builders chasing tight-radius turns at the track or clean engine-bay aesthetics on a slammed street cruiser, fenderwell routing delivers breathing room that standard bottom-exit designs simply can’t match.
Materials, Construction & Finish Details
We start with 16-gauge cold-rolled mild steel tubing, chosen for its balance of wall strength and weldability during fabrication. Each primary is mandrel-bent in a single pass to maintain consistent inner diameter through every radius, eliminating the kinks and flat spots that choke flow in cheaper crush-bent designs. The collectors use a slip-fit joint with bolt flanges, allowing you to clock the collector position during installation and seal the joint with the included high-temp gaskets.
Headers ship in bare steel finish, giving you control over final coating choice. Many racers run them raw and re-coat seasonally; street builders typically apply high-temp ceramic or powder coat before installation to manage underhood heat and resist rust. We include stainless hardware for the collector flanges, but you’ll supply your own header bolts matched to your block and head combination.
Fitment & Clearance Considerations
Application-Specific Engineering
Each fenderwell header design is built around a specific chassis platform—GM A-body, F-body second-gen, B-body Mopar, and similar muscle-era frames each get their own flange pattern, tube routing, and collector exit angle. We publish detailed fitment notes for every application covering engine-block compatibility, steering-column interference points, and fenderwell modification requirements. You’ll want to verify your exact year, model, and any non-stock components before ordering to ensure the kit clears your specific build.
Installation Notes
Installation requires cutting or notching the inner fender panels to create a pass-through for the primary tubes. Most builders remove the fenders entirely for easier access, mark the clearance zones with the headers test-fitted, then trim the sheet metal with an air saw or plasma cutter. Plan to relocate or re-route any brake hard lines, wiring harnesses, or washer-fluid reservoirs that share the fenderwell space. Heat shielding around the primaries protects paint and prevents radiant heat from cooking rubber components. The same careful routing and protection strategy that applies to block-hugger headers carries over here—tight clearances demand attention to thermal management and fastener torque sequences.
Headers Built for Tight-Clearance Muscle Applications


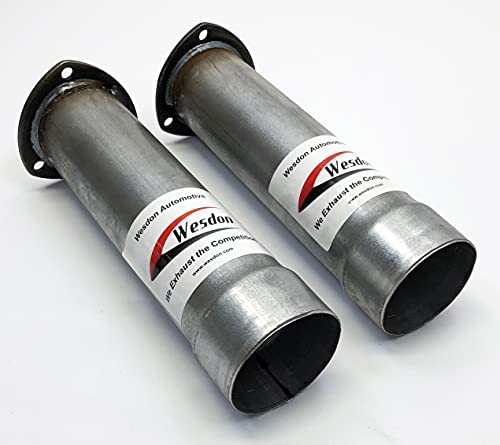


Rated 4.8 by verified buyers
Common Questions About Fenderwell Header Fitment
Yes, all fenderwell header designs require notching or cutting the inner fender panels to create pass-throughs for the primary tubes. The amount of material removed varies by application, but our fitment instructions include templates and clearance diagrams showing exactly where to trim. Most builders remove the fenders entirely during installation for easier access and cleaner cut lines.
You'll also want to deburr the edges and apply rust-preventative primer to any exposed sheet metal after cutting. If you plan to run the car on the street, consider adding rubber grommets or edge trim where the tubes pass through to keep road spray and debris out of the engine bay.
Fitment depends on your specific chassis platform and accessory layout. Most of our fenderwell header applications are designed around manual-steering configurations because power-steering boxes, pumps, and hoses occupy critical fenderwell real estate. If your car runs power steering, check the detailed fitment notes for your application—some designs accommodate certain power-steering setups with minor bracket relocation, while others require switching to manual steering or aftermarket compact steering components.
Factory air-conditioning compressors and lines can also conflict with fenderwell routing, especially on GM A-body and F-body platforms. We recommend test-fitting the headers with all accessories in place before final installation to identify any interference points.
Because fenderwell headers route the primaries upward through the inner fenders instead of downward below the engine, the lowest point of the exhaust system moves from the header collectors to your tailpipes or mufflers. On a typical installation, you gain 4 to 6 inches of clearance at the front of the chassis compared to traditional bottom-exit long-tubes, which is critical for lowered cars, race-height suspensions, or vehicles with steep driveway approach angles.
The exact clearance improvement varies by application and how you route the intermediate pipes from the collectors to the mufflers, but most builders report eliminating scraping issues that plagued them with conventional header designs.
Absolutely. Our fenderwell headers ship in bare mild steel finish specifically so you can apply your preferred coating before installation. High-temp ceramic coating is the most popular choice—it reduces underhood temperatures, resists rust, and comes in a variety of colors to match your engine-bay theme. Powder coating offers similar corrosion resistance but may not withstand sustained exhaust-gas temperatures as well as ceramic.
If you choose to run the headers uncoated, expect surface rust to develop within weeks of exposure to moisture and road salt. Many racers who change headers frequently run them bare and simply wire-brush and re-coat between seasons. Whichever finish you select, make sure to mask the collector flanges and gasket surfaces to maintain a clean seal during installation.
Most of our fenderwell header collectors feature 3-inch or 3.5-inch slip-fit outlets, sized to mate with standard aftermarket exhaust tubing and performance mufflers. The exact collector diameter is listed in the product specifications for each application, so verify your kit before ordering intermediate pipes or having custom exhaust work done.
Because the collectors exit high on the chassis near the firewall, you'll typically run shorter intermediate pipes to reach your mufflers compared to a traditional under-engine exhaust layout. Many builders use mandrel-bent 90-degree elbows to transition from the collector down to the rocker-panel area, then route straight pipes rearward to the mufflers and tailpipes.
Legality depends on your local emissions regulations and whether the headers carry an Executive Order number for your specific vehicle application. In California and states that follow CARB standards, aftermarket headers must be certified for the year, make, and model of your vehicle to remain street-legal. Most fenderwell header designs are sold for off-road or racing use and do not carry CARB certification.
If you're building a dedicated race car or off-road vehicle, emissions compliance isn't a concern. For street-driven cars in regulated areas, check your state's inspection requirements and verify whether the specific header kit you're considering is approved for road use. Some builders maintain separate header sets for track and street to stay compliant during inspection periods.
Yes, in most cases. Because fenderwell headers relocate the exhaust exit point from underneath the engine to the side of the chassis near the fenderwells, your factory exhaust hangers and routing path no longer align. You'll typically fabricate or purchase new intermediate pipes that connect the header collectors to your mufflers, and those pipes will require custom hanger placement to support the new routing path.
Many builders weld new hanger tabs onto the intermediate pipes and install rubber isolators at points along the frame rail or floor pan. The goal is to support the exhaust system without transferring vibration into the chassis, so plan for at least two hangers between each collector and muffler. If you're working with a professional exhaust shop, bring the car with headers installed so they can measure and fabricate the intermediate section with proper support built in.